If your computer is slow and taking too long to load files and documents and it randomly hangs then your hard disk is over-working causing performance issues on your Windows 10. Your task manager displays 100% disk usage that has to be managed otherwise the system becomes unresponsive.
Many users have also reported that they have faced 100% disk usage in Windows 10 when they updated to Windows OS making their experience rough and frustrating.
To fix the 100% disk usage error displayed by the task manager in Windows 10 there are some potential methods that you can try to fix errors on your computer.
How To Fix 100% Disk Usage in Windows 10 Task Manager
Fix 1: Disable SuperFetch
SuperFetch is a window feature that aims to speed up your PC by preloading the frequently used apps improving the user experiences. It helps in the efficient running of programs on your Windows. However, it has been identified that disabling Superfetch can fix the issue because it’s a potential cause of high disk usage on Windows 10.
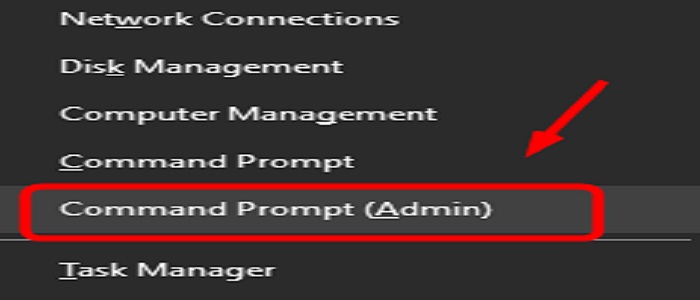
- Press Windows keys and type Command Prompt
- Go to the Run as Administrator.
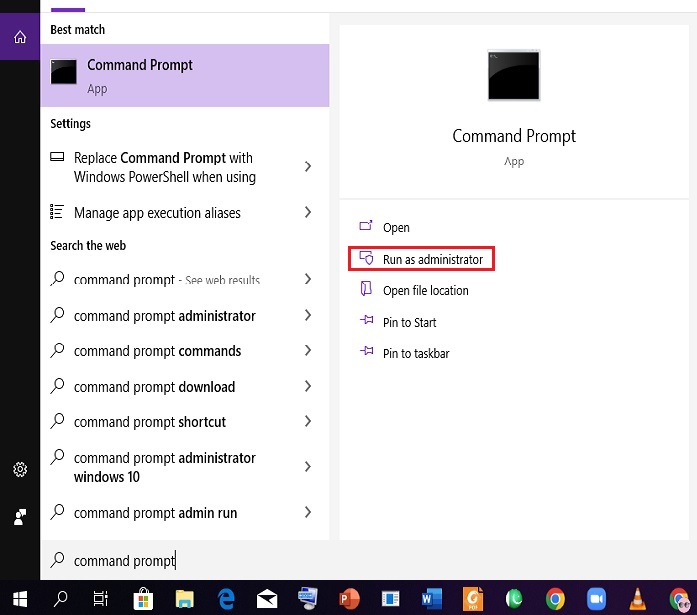
- User Account Control prompt will appear. Click Yes.

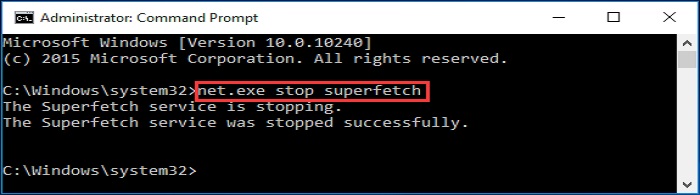
- Now type net.exe stop superfetch in the command prompt window and hit Enter. You can also try the net.exe stop sysmain command if the above is shown to be invalid.
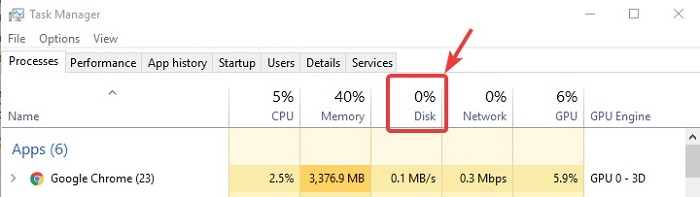
- Check if the issue is resolved. For this go to the Processing Tab in the task manager. At the top of the disk, you will be able to see the disk usage in percentage.
Fix 2: Update Windows 10
Any bugs and errors in your Windows are fixed by updates that are automatically installed into your computer. However, if you have missed any of these updates then your system can show a 100% disk usage error that interrupts the smooth functioning of the system.

- Go to the Settings and then to Update & Security
- Click on Windows Update to initiate the updates. You will see the updates in the process. Once it is finished and the problem is not yet resolved you can try other fixes.

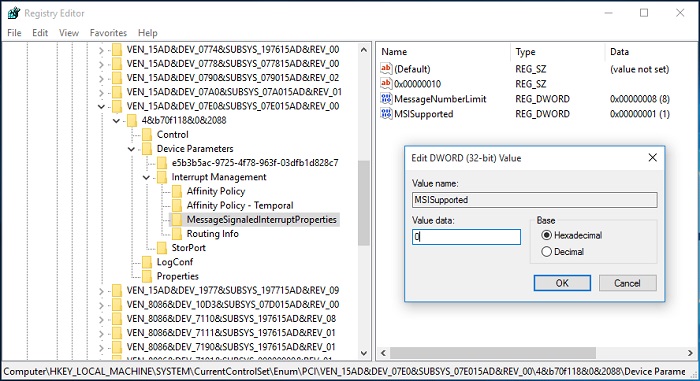
Fix 3: Disable MSI Mode Via the Registry
One of the drivers which appears to cause a 100% disk usage issue on Windows 10 is the StorAHCI.sys driver. It connects your storage devices via Advanced Host Controller Interface PCI-Express and any firmware bug can cause this issue due to which you should disable MSI mode via the registry.
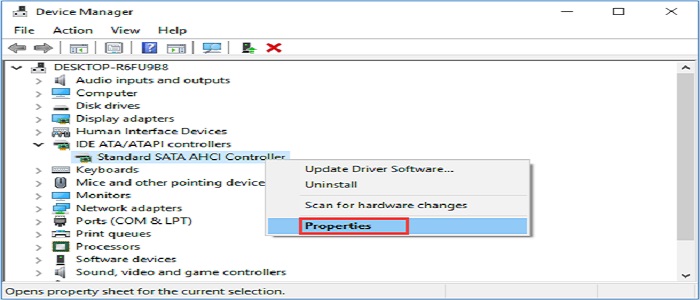
- Press Win+R and type devmgmt.msc in the run box and hit Enter.
- Right-click Standard SATA AHCI Controller under the IDE ATA/ATAPI Controllers option and select Properties.
- Go to the Driver tab and click Driver Details. If you see storahci.sys in the list, you are running the inbox driver.

- Head to the Details tab and select Device instance path from the Property drop-down menu.

- Type Regedit in the Run box to open the registry editor.
- Navigate to the HKEY_LOCAL_MACHINE\System\CurrentControlSet\Enum\PCI\ and open the AHCI controller.
- Now expand Device Parameters\Interrupt Management\MessageSignaledInterruptProperties. Here you will see the MSI-supported key. Double-click it and change the value data to 0.
- Click OK to confirm and restart the Windows.
Fix 4: Run a Disk Check
A disk check indicates if there is any physical damage to your hard drive to rule out the reason behind high disk usage.
- Press a Windows key and search for Command Prompt and double click it.
- Type chkdsk.exe /f /r and hit Enter on your keyboard. Now type Y to confirm that you like to run a disk check when you restart the computer.

Fix 5: Reset Virtual Memory
Virtual memory is an extension of a hard drive. When the RAM is not sufficient to perform a task, Windows temporarily store files in virtual memory and swap them back to RAM when required. Hence, any issue with the virtual memory caused the high disk usage issue on your Windows 10.
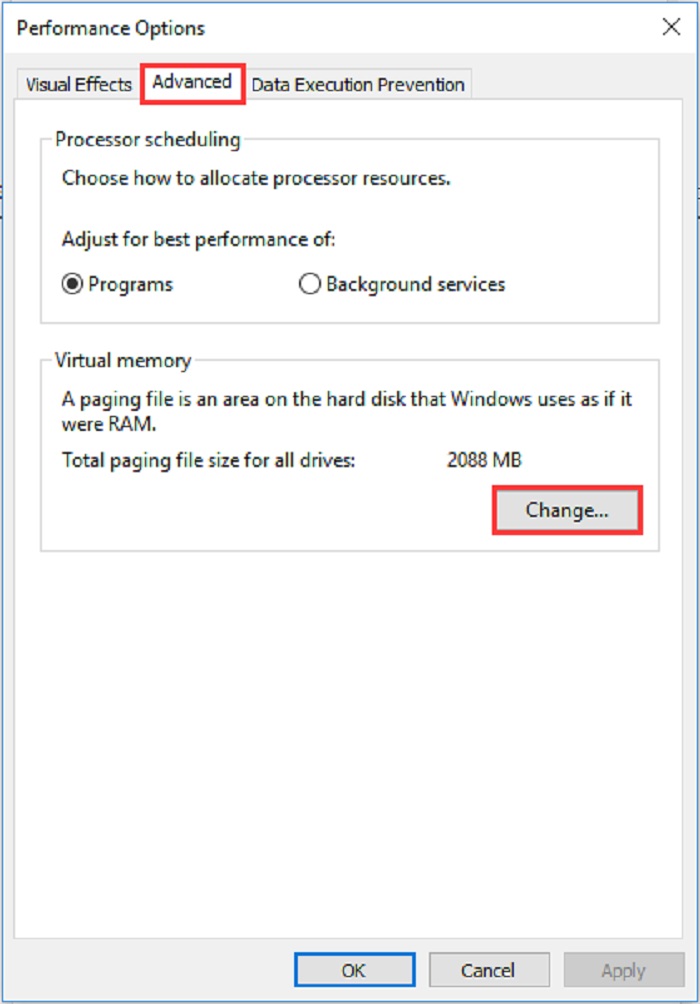
- Press Win+Pause/Break keys and click on Advanced system settings
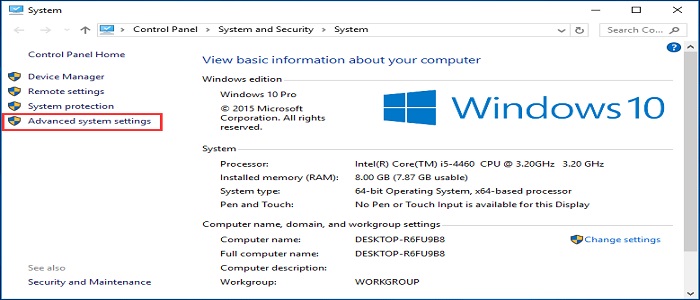
- Go to the Advanced tab and click on Settings.
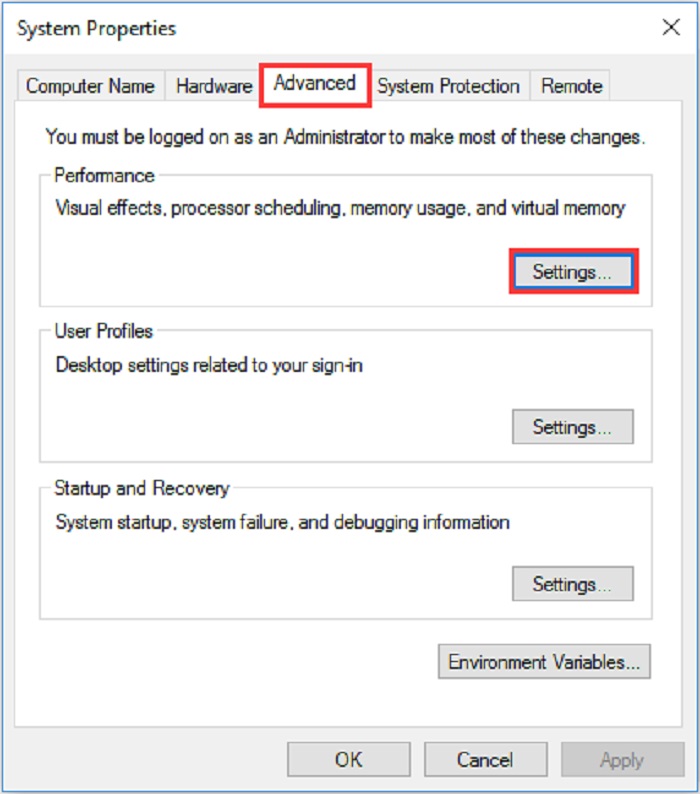
- Navigate to the Advanced tab and click on Change in the virtual memory section
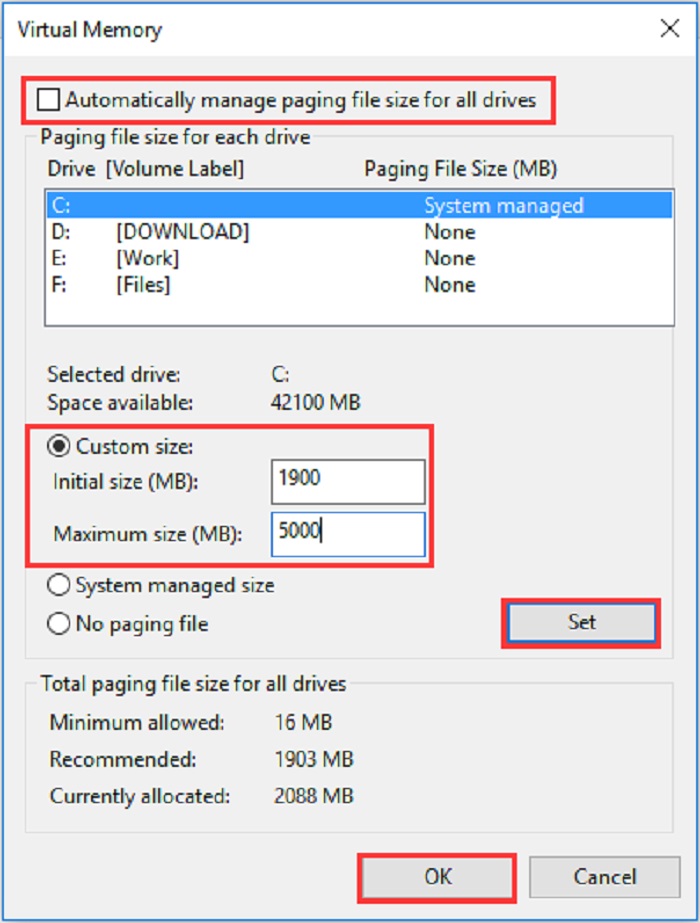
- Ensure that the Automatically manage paging file size for all drives checkbox is not ticked.
- Now highlight your computer drive which is usually C and now customize the initial and maximum size of virtual memory on your computer. Set the Initial size as recommended and the maximum size to be 1.5 times the size of your RAM.
- Now, click Set and then OK.
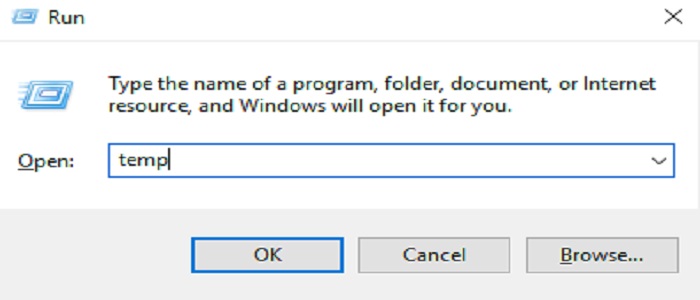
- Now to clear all the temporary files from your computer press the Windows and R keys simultaneously.
- Type temp in the run box and hit Enter.
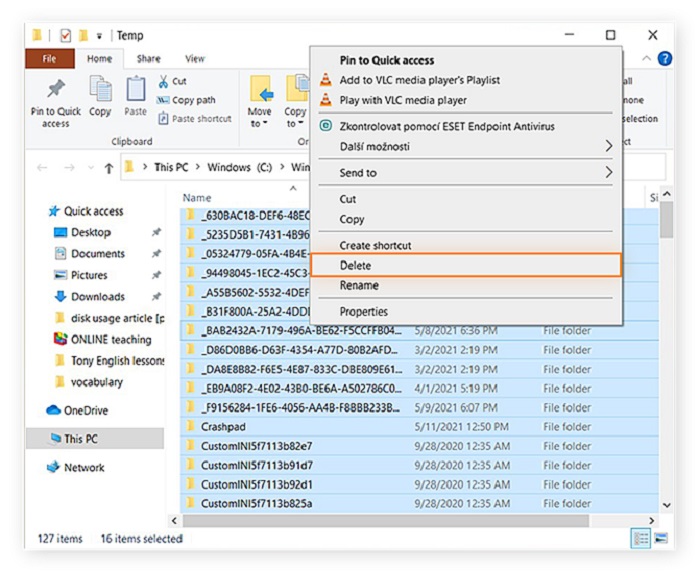
- Select all the files in the Temp folder and delete them
Fix 6: Disable Windows Update Services
It is recorded by some of the users of Windows 10 facing this 100% disk usage error on their PCs that it is resolved by disabling the Windows update services. Here is how you can do this.
- Press Win+R keys and type services.msc then press OK.

- Scroll down and double-click on Windows Update

- Drop down the Startup type box and choose Disabled from the options.
- Now press the Stop, Apply, and then an OK button.

Fix 7: Temporarily Disable Antivirus Software
If you have any Antivirus software installed it can also interfere with your hard drive and cause high disk usage issues. Hence, you need to disable it without any fear of the security of your PC as an inbuilt anti-malware application Window Defender keeps the system safe.
Disable AVAST
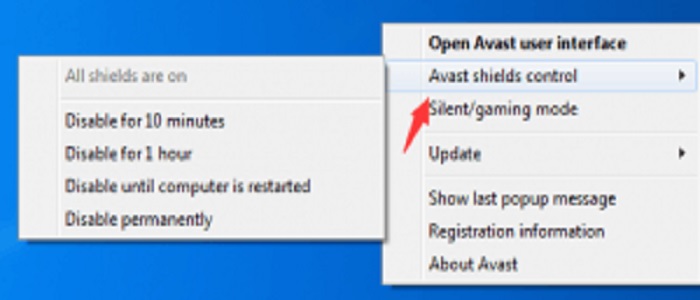
- Right-click the Avast Antivirus icon and click Avast shields control.
- Select the option depending on how long you want to disable Avast Antivirus.
- Click Yes to confirm.
Disable AVG
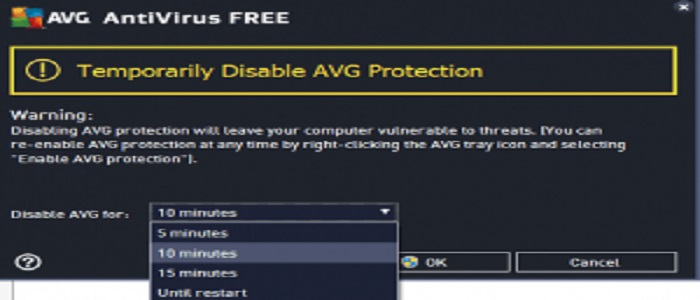
- Right-click the AVG icon and click Temporarily disable AVG protection.
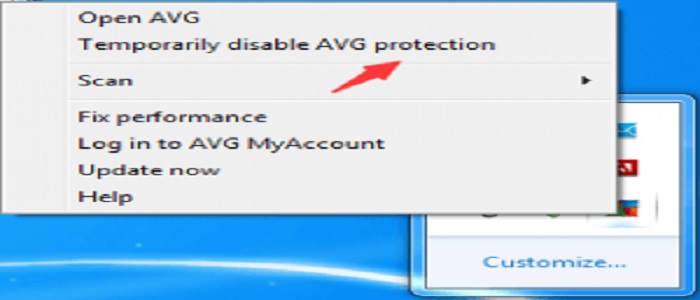
- Choose how long you want to disable it and Click on Ok.
Disable Norton Antivirus
- Right-click the Norton Antivirus icon and click Disable Smart Firewall to temporarily shut down the firewall.
- Now click on Disable Antivirus Auto-Protect to temporarily disable antivirus protection. Also, specify the amount of time you want to disable Norton Antivirus.
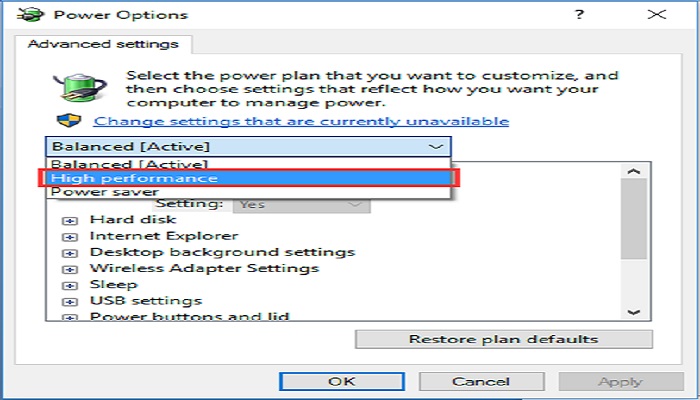
Fix 8: Change Energy Options from Balanced to High Performance
It is reported that changing energy options from balanced to high performance fixes the Windows 10 100% disk usage.
- Go to Power Options and click on Change plan settings.
- Then click on Change advanced power settings and choose High performance from the drop-down list and make sure all plan settings are set on default.
- Restart your system
Fix 9: Change Settings in Google Chrome and Skype
Many users have reported that changing settings in Google and Skype have resolved the 100% disk usage error on Windows 10. This is how you can do this.
For Google Chrome:
- In Google Chrome, go to the Settings and scroll down and click Advanced.
- In the Privacy and security category, make sure the Use a prediction service to load pages more quickly is turned off.
- Also, disable Continue running background apps when Google Chrome under the System settings.

For Skype:
- Open Skype and select the Security tab and click on the Edit option.
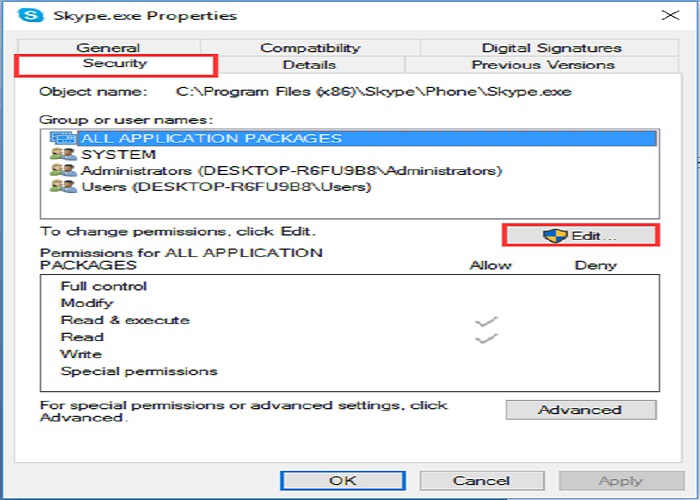
- In the list of Groups or Usernames select All application packages
- Check the Write and click on Apply. After that Press OK.

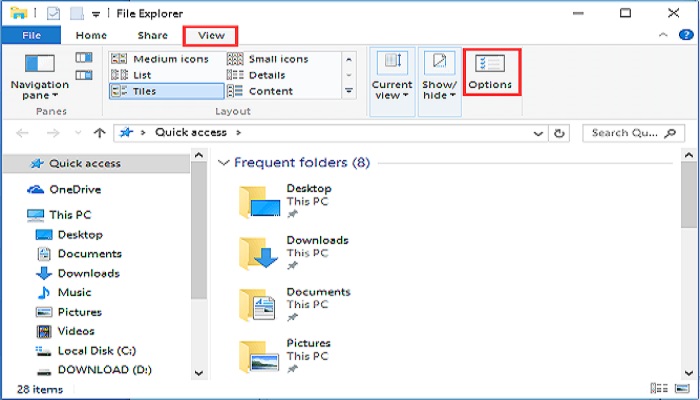
Fix 10: Change File Explorer Options
- Open Windows 10 File Explorer, go to the View, and click Options
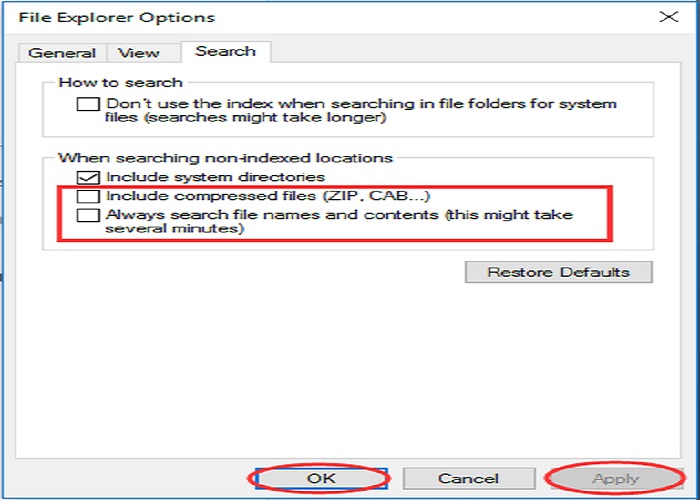
- Go to the Search tab and uncheck Include compressed files (ZIP, CAB…) and Always search file names and contents
- Click Apply and then press OK.
You May Also Like
- How To Fix No Sound No Audio On Windows 10
- How To Fix No Audio Output Device Is Installed Error in Windows 10
- How To Fix Windows 10 Realtek High Definition Audio Driver Issue
- How To Easily Fix Windows 10 Freezes Randomly Problem
- How To Fix Stretched Screen Display Problem on Windows 10
- How To Fix Computer Screen Flickering Continuously On Windows 11/10
- How To Fix IDT High Definition Audio CODEC Driver Problem


![[Fixed] Resident Evil Village Lag Issues on PC](https://www.cputemper.com/wp-content/uploads/2022/04/Fixed-Resident-Evil-Village-Lag-Issues-on-PC-300x168.jpg)