It can be super annoying when you start your computer, and instead of getting to work or play, you’re met with a weird error message. One of those frustrating messages is the “CPU Fan Error!” It often shows up on motherboards like ASUS and American Megatrends, and it might not be as simple to fix as it seems, even if your CPU cooler is working fine.
The CPU Fan Error is usually triggered after a computer shuts itself down due to overheating. This error shows that fans are at fault and may not be providing sufficient air.
For Asus and American Megatrends, there are ways to fix faulty CPU fans. We have written this post to explain the reasons and how to fix them.
How CPU Fan Error Can Appear
Usually, the CPU fan error appears during the bootup or startup process. It will not show up when you are already using the PC. The error message sometimes varies but you will see a screen similar to below or the error message:
- “Error: CPU Fan Has Failed!”
- “CPU Fan Error”

What Causes ASUS CPU Fan Errors on Startup?
This error shows that the motherboard safeguard feature is working fine. If the fans don’t spin properly then it may cause an increase in CPU temperature, consequently it can damage internal hardware.
The most common reason that triggers this error is.
- CPU fan isn’t connected with the motherboard cpu_fan header properly.
- Incorrect fan settings in BIOS.
- Dust and debris slowed down the fan RPM.
- The fan is broken permanently.
- PC overheating
How To Fix CPU Fan Error on Boot or Startup
This error may be related to hardware or software, so the fixes may differ for each user.
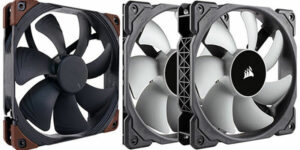
Users who are using Corsair or NZXT Kraken AIO CPU cooler mistakenly connect the wrong pump header in the motherboard. Hence, see this error message.
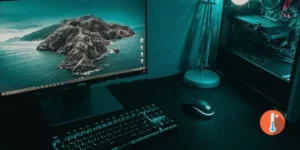
1. Move Your PC To a Cool Place
If you keep your computer where it’s really hot or sunny, it might get too hot and switch off, even if the fan is running. To avoid this, put your computer in a cooler room and don’t leave it in the direct sunlight when it’s daytime.
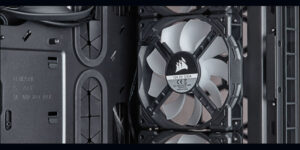
2. Check your CPU fan
As you have your computer open, give its fans a once-over to make sure they haven’t gotten wobbly or dropped out of position. Depending on the kind of fan, you might need to use a screwdriver or glue to firmly attach them again.
3. Try Other CPU Fan Header
Give a different CPU fan slot a shot. If your motherboard has more than one CPU fan slot, try connecting the fan to another one. Sometimes, this can resolve the CPU fan error.
Check to see if the CPU fan is properly connected.
The reason why you’re seeing this fan error on Asus and Megatrends motherboards is that either nothing is connected to the CPU_fan header, or it’s plugged into the wrong header.
- Make sure the CPU FAN is installed on the right position of the motherboard and twist the screws tightly
- For those who are using a water cooler i.e. H100i or H100i V2 and still fan speed error pops up, connect the Hydro pump to the AIO_PUMP header (not in CHA_FAN).
- Make sure that the CPU FAN cable is firmly connected to the CPU_FAN connector rather than the CHA_FAN.
5. Set CPU Fan Speed Lower Limit
Is the CPU fan running at the required RPM? Most of the time, the Asus fan error gives you a hint that the fan is underperforming concerning its RPM.
For users who are using NZXT, a Corsair fan with a lower revolution speed, the system may not be able to correctly detect it.
Set the “CPU Fan Speed Low Limit” to 200 RPM in the BIOS settings.
To alter the fan speed’s lower limit, follow these steps:
- Press F1, F10, or the Delete key at startup to get into BIOS.
- In Advanced choices, find the choices for the CPU fan. (This part may be different depending on the type of your computer)
- To change the CPU fan RPM warning, find the setting that does that. The number that should be used by default is 600 RPM.
- Change the setting from 300 RPM to 450 RPM and save the changes.
- Get out of the BIOS and start up the machine.
6. Disable CPU Fan Speed Monitoring in ASUS BIOS
Sometimes the CPU fan error shows up despite the fact that fans are working fine. Follow these steps:
- Boot into BIOS.
- Navigate to the aforementioned Advanced settings.
- Look for the Monitoring (Monitor) section.
- Set the CPU Fan Speed to Ignore and Confirm modifications.
7. Update the BIOS
Most of the time CPU fan errors on ASUS and Megatrends are related to BIOS software malfunctioning. If you simply update the BIOS version to its latest then you are good to go.
8. Check Fan Settings in Your BIOS
If you have recently changed the BIOS settings, then it may be a cause of why the Asus fan error is appearing.
- Open BIOS
- Select Advanced Settings.
- Select Hardware Monitor.
- There you will see the CPU Fan option.
- Enable Active Heat Sink and Fan Duct with Fan.
- Disable Passive Heat Sink and Fan Duct without Fan.
- Save your changes and exit BIOS.
9. Replace Your CPU’s Fan
If the error is still appearing on the Asus motherboard on boot-up, then it may be a hardware problem. You need to buy a CPU fan and replace it with a broken fan.
Related: Best Portable Laptop Cooling Pads For Gaming
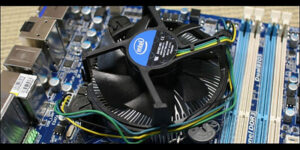
10. Clean Your CPU’s Fan
The dust is the enemy of computer hardware. When dust builds up inside it blocks fins to rotate at ideal speed.
You should regularly clean the CPU fans. To do this turn off the PC unplug the power cable and use canned air to blow the dust off.
11. Try an Alternate CPU Fan Header
Modern motherboards have multiple fan headers if one header doesn’t work. Try plugging the fan into a different slot. This sometimes fixes the CPU fan error.