Sony Vegas is a video editing application that is usually famous among YouTubers and content creators. It helps them create and edit videos and upload them on several platforms. However, it is a widely used app it is reported that Sony Vegas keeps on crashing on Windows resulting in work loss.
This abrupt crash happens on startup and sometimes in the middle of video editing which is distressing. However, we have brought up a few ways to resolve this issue to ensure the smooth working of this amazing video editing app.
How To Fix Sony Vegas Keeps Crashing On Startup?
Apply the below-mentioned fixes.
Fix 1. Delete temporary files from your system
One of the ways to ensure smooth and error-free use of Sony Vegas is to delete all the temporary files from your PC. This will free the space on the hard disk rendering space for resource files of Sony Vegas. It will not just ensure the stable working of the app but also speed up your PC. To do this follow the following simple steps:
- Press Win+R on your keyboard to invoke a Run box
- Type %temp% on the box and press OK

- A window will appear containing all the temporary files you can delete. So press Ctrl+A to select all the files. Right-click the selected files and click on Delete.
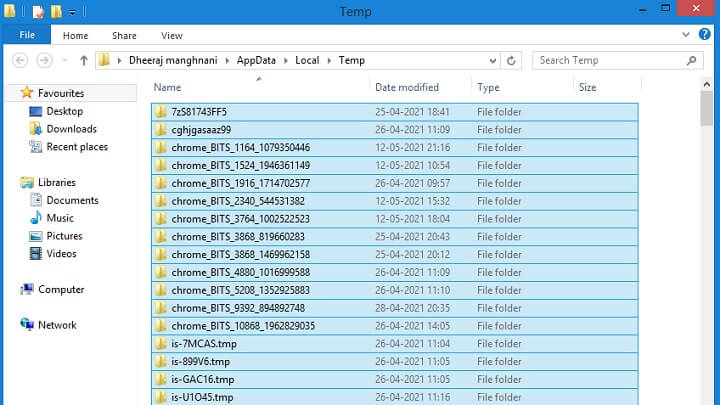
- Restart your PC and check if the issue is resolved
Fix 2. Set Priority to High for Sony Vegas
Microsoft allows changing the priority of the application installed in the system. Programs with high priority have more rights and allow them to utilize more resources it needs. This will make sure that Sony Vegas is working well. Here are the steps to alter the settings:
- Right-click anywhere on your Taskbar and then click on Task Manager
Or Press Windows+R to invoke Run box and type taskmgr.
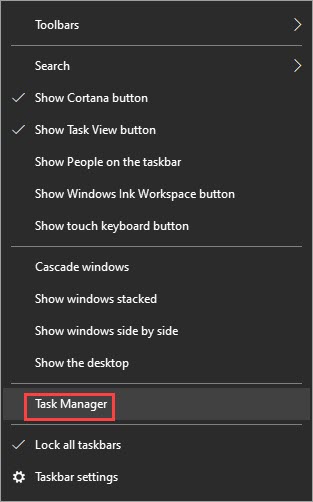
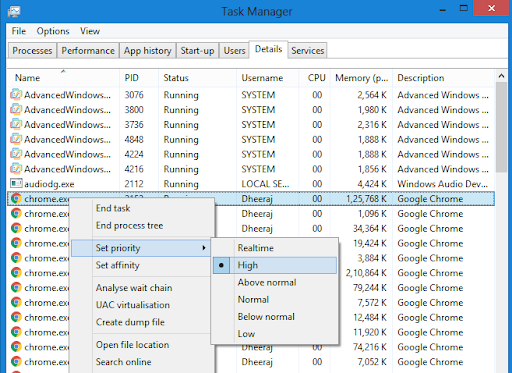
- Scroll and right-click on Sony Vegas.
- Move your cursor to Priority or right-click on it and switch the priority to high by clicking on High.
Fix 3. Modify Processor Setting
Another way to fix Sony Vegas is to modify the processor settings and increase or decrease the CPU cores allotted to Sony Vegas. Here are the steps to do this.
- Right-click anywhere on your Taskbar and then click on Task Manager
Or Press Windows+R to invoke Run box and type taskmgr.
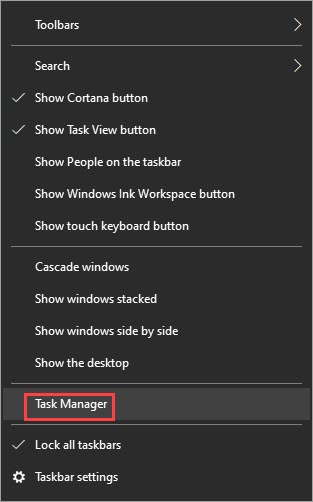
- Taskbar window will appear. Click on the Details tab.
- Scroll and right-click on Sony Vegas.
- Then Click on Set Affinity. You can increase or decrease the number of CPU cores for this program. If there is any uncheck the box, then check all CPU cores and check if the issue is resolved. Otherwise, if all the cores are selected, then you may try decreasing the CPU cores by unchecking one of the boxes.

Fix 4. Update Graphic Card Driver
Another way to fix the crashing issue of the program is to update the drivers of the system, especially the graphic card drivers. This can be done either manually or automatically.
- Manually, you can update your video card driver via Device Manager. If Windows doesn’t detect the latest available update, you can search on the manufacturer’s website as well. Note that you are always choosing the drivers that are compatible with your Windows.
- If you are lazy, then you can also do it automatically using software that can scan your hardware and drives and updates them to the latest version or install the correct drivers for your system.
Install any of the software. Click on the Scan button and Update the graphics card driver.
Fix 5. Customize Sony Vegas Settings
Changing a few settings can reduce the possibility of crashing. Here are some easy steps to follow
- Adjust Hardware settings
On the toolbar, click Options then click on Preferences.
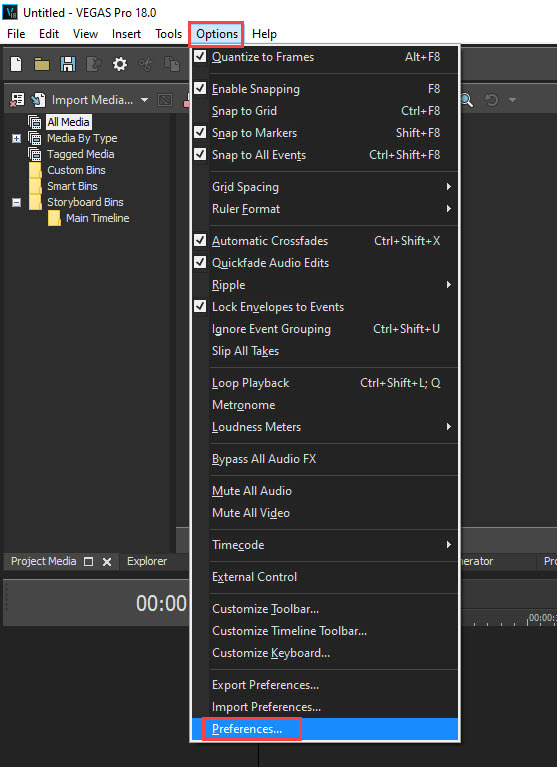
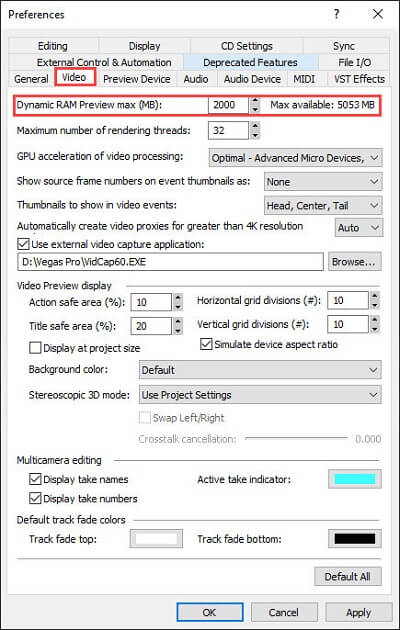
- Go to the Video tab, and adjust the Dynamic RAM Preview max (MB) value. You can set a value that’s between 1/3 to 1/2 of your maximum RAM available
- Turn Off the GPU acceleration of video processing. Click Apply then OK.
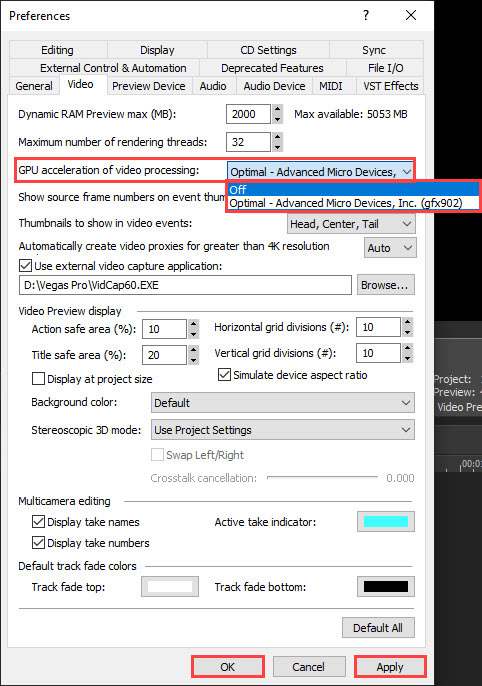
Note: Turning GPU off can cause the instability of the system. However, if you have a powerful GPU, you can turn it off or on to check which way works better for you.
- Disable Multi-core rendering
As Sony Vegas is intensive, by default it can use all cores to process. However, it notices that disabling multi-core rendering has resolved to crash issue of the program.
- Hold Ctrl and Shift, and click Options. Then click on Internal.
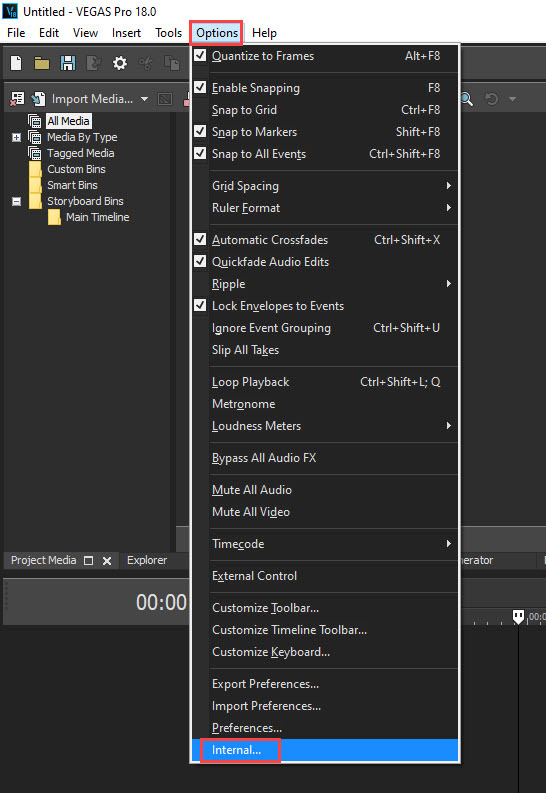
- Type multi-core in the search bar at the bottom.
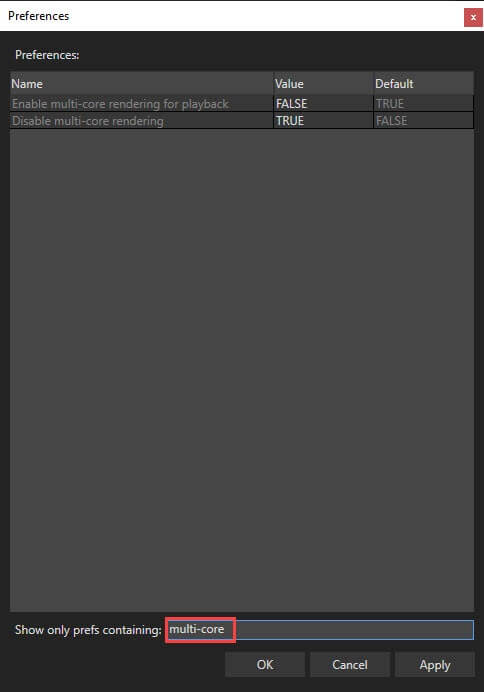
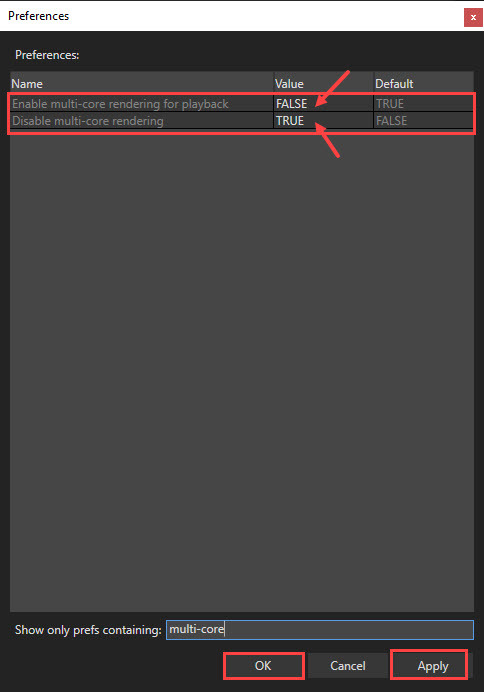
- To Enable multi-core rendering for playback, change the value to FALSE. To Disable multi-core rendering, set the value to TRUE. Then click Apply and OK.
Fix 6. Scan and repair system files
Sony Vegas can crash due to corrupted files in the system. For basic troubleshooting, you can try running the sfc /scan now command. If it still doesn’t fix your problem, you may need a more powerful tool to scan and repair your system. Restoro is one such repairing tool that you can use.


![[Fixed] Resident Evil Village Lag Issues on PC](https://www.cputemper.com/wp-content/uploads/2022/04/Fixed-Resident-Evil-Village-Lag-Issues-on-PC-300x168.jpg)