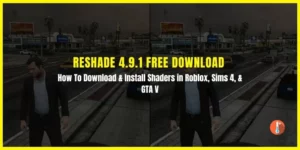
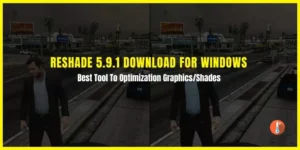
ReShade 4.9.0 is an open-source tool that enhances PC game visuals by modifying data sent from the CPU to the GPU. It allows gamers to apply various custom processing templates to their favorite games, adding effects like Anti-Aliasing, ambient occlusion, depth of field, color correction, and more.
ReShade 4.9.0 old version works with single-player games to prevent cheating in multiplayer, and users can create their own effects using ReShade FX.
- Developer: ReShade
- Version: 4.9.0
- License: Free
- File Size: 2.89 MB
- Updated: Jan 04, 2021
- Requirements: Windows 11, 10, 7 64-bit.

Due to the stability of adding shaders in Roblox, GTA V, and Sims 4 ReShade 4.9.0 download is still available for you. Reshade 4.9.0 (descargar) old version is official, untouched, and genuine. You can download the same tool as you can find on the official website. We don’t modify any downloads.
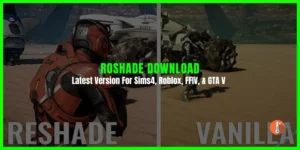
Reshade 4.9.0 is an open-source amazing tool for gamers to enhance graphics in Sim4, Dove 2.0, QuantV, GTA V, and Roblox. It enhances the gaming experience by correcting game colors and graphics.
ReShade 4.9.0 Shader download supports all of Direct3D 9, Direct3D 10, Direct3D 11, Direct3D 12, and OpenGL. and Vulkan. To download Reshade a computer with Windows 7 SP1, 8.1, 10, or 11 and .NET Framework 4.6.2 or higher installed is required. It’s latest version Reshade 5.8.0 is also available to download.
What’s New in ReShade 4.9.0 Download/Changelog
Here are some noticeable updates and improvements which came with this version:
- Added effect caching
Compiled effects are now cached to disk so that subsequent loads can use the cached data to speed up loading significantly. By default, the cache is stored in %TEMP%, so that it can be shared across all ReShade installations. To override the location, change the “IntermediateCachePath” option under “[GENERAL]” in ReShade.ini. There is a new button on the Settings tab to clear the cache (sometimes necessary to ensure changes to effect files are applied). - Added support for D3D12on7 (ReShade now works in Cyberpunk 2077 on Windows 7)
- Added depth buffer copy before clearing in OpenGL (depth buffer detection now works in Minecraft)
- Added ReShade FX support for rectangular matrices and integer matrix multiplication
- Added error to log when trying to capture screenshot for 16-bit back buffer (which is not supported)
- Added option to move all techniques from an effect file simultaneously in the UI technique list by pressing the shift key
- Added text logging for some common back buffer formats
- Added debug names to D3D11 and D3D12 objects in release builds to simplify debugging with the debug layers
- Added option to filter application list in setup tool using custom search terms (start typing into the text box at the bottom of the application list to filter it)
- Added warning message box to setup tool when enabling global Vulkan layer
- Improved HLSL and GLSL loop code generation for simple condition expressions
- Improved general frame update performance slightly
- Changed the editor window to support opening multiple tabs pointing to different files
- Changed logging to use Win32 API directly (to allow multiple editors to open the log simultaneously)
- Changed texture pooling to not share textures within the same effect file
- Fixed local network traffic (on localhost) counting towards the network detection heuristic
This means that depth buffer detection is no longer blocked in games that run local servers in single-player, like in Minecraft - Fixed mouse cursor being locked in a small portion of the screen in some games
- Fixed corrupted depth data in D3D12 apps (e.g. Cyberpunk 2077)
- Fixed ReShade not showing up in D3D9 apps that do not have an override window set for presentation (e.g. MPC-HC)
- Fixed progress bar for compiling effects not actually showing any progress
- Fixed enabling an effect not auto-selecting the relevant tab in the variable list if the tab UI is used instead of the tree UI
- Fixed disabling the “Load only enabled effects” option not reloading skipped effects
- Fixed potential crash when an INI file is loaded while effects are still being loaded
- Fixed OpenGL context creation using incorrect profile flags when the game is using OpenGL 3.0 or 3.1
- Fixed OpenGL compatibility flag not being set in some cases for legacy contexts
- Fixed global app config options being read from the wrong section in DXGI
- Fixed D3D11 texture description not being overwritten for “ID3D11Device3::CreateTexture2D1” calls
- Fixed the “vkDestroyDevice” hook not being called
- Fixed hook error logged on Windows 7 when “CreateDXGIFactory2” is called
- Fixed it being possible to move the variable editor splitter outside the window area
- Fixed preprocessor hanging when encountering macro with an unterminated argument list
- Fixed duplicate sample and storage references in effect pass
- Fixed crash if an invalid sampler or storage is referenced in effect pass
- Fixed setup tool exception when extracting repository without a dedicated “Textures” directory
- Renamed screenshot config section to “SCREENSHOT” instead of “SCREENSHOTS” (setup tool will update your config automatically)
- Renamed depth buffer detection-related config options to all reside within a “DEPTH” section instead of separate “D3D9/10/11/12/OPENGL/VULKAN” sections
- Renamed all references to “shaders” to “effects”
- Cleaned up punctuation in log messages
Where Can I Download Reshade 4.9.0?
Although we recommend you download the ReShade Latest Version. However, for many reasons, players choose to download Reshade 4.9.0 old version. If you are also looking for it then try downloading the old Reshade 4.9.0 version from our site.
How To Install Reshade 4.9.0?
- First download and run the old version available here.
- Follow the instructions to install ReShade for a game of your choice.
- Launch the game and use Home to access the in-game ReShade GUI.
How To Add a New Reshade Preset?
First of all, adding a game, adding a preset, and adding a screenshot are three separate tasks.
When adding a preset, the first thing you should do is look at the game list, and see if the game you want to add a preset to is already listed. If it is, click on it, and go to the “Adding a Preset” section
1. Adding a Game
If the game already is on the list, there’s no need to add it a second time
If the game is not already on the list, you first need to add it to the list. Click on the “Add a game to the list” button at the bottom of the list.
To add a new game, the only thing you need to fill in is the game’s title.
The SweetFX Notes field can be used to note any special tricks that is needed to get SweetFX to run with this game or any other general SweetFX note related to this game.
Preset configuration is NOT added in this step!
2. Adding a Preset
Now that the game is in the list, you can select that, and press “Add a preset“
You can then input the preset name, which SweetFX version it’s for, and the settings text!
Clicking save on that will send you to the newly created preset, and you can finally start adding screenshots!
3. Add a Screenshot
When you’re on a preset you created, you have a button called “Add new screenshot”!
Clicking that will lead you to a form where you can select the image to upload, what state SweetFX is in that image, and if you want, a description and comparison image.
If you add a comparison image, it should be as similar as the other image, but with SweetFX turned off. The images will be overlaid each other, and the user can easily switch from one to the other
How to Uninstall ReShade 4.9.0?
If you have installed the Reshade shader installer to play these games i.e. GTA V, Sims 4, cyberpunk, Skyrim, Roblox, RDR 2. Then follow these solutions to uninstall Reshade.
The “Do it for me / I don’t wanna read” solution:
Delete the entire game folder and re-download the game. No, just uninstalling the game will not work.
If you don’t wanna re-download the game and still don’t wanna read” solution:
Go to the game’s executable folder and delete any of the following files you see:
- D3D8.DLL
- D3D9.DLL
- D3D10.DLL
- D3D11.DLL
- OPENGL.DLL
- DXGI.DLL
Then delete these additional files:
- D3D9.INI
- D3D10.INI
- D3D11.INI
- OPENGL.INI
- DXGI.INI
- Along with the reshade-shaders folder
How to Download Reshade Roblox?
We have thoroughly covered this topic si read it here Download Roblox Shaders: How To Install And Use Shaders Presets On PC/Mobile